
.
Lesson 5
In this lesson, we’re going to start Fingerknitting!
Lesson 5.1 starts at the very beginning with How to Make a Slip Knot & How to Wind a Centre Pull Ball.
Lesson 5.2 will show you exactly how to teach your child the simplest form of fingerknitting.
Lesson 5.3 takes fingerknitting to the next level by using both hands – a bit more challenging & lots of fun!
Lesson 5.1
First Steps
It’s best to start from the very beginning – even if you know how to make a slip knot or wind a centre-pull ball – it’s always good to think about how you DO it!
It’s amazing how difficult it can be to explain something quite simple when you have to break down every movement – especially if you’re doing & talking at the same time!
Watch these videos & really make an effort to see all of the movements that I make.
Take notes – this will help you see if you’re missing an important step when you start to teach it to your child.
Also, make sure that you sit beside your child (on her/his right side), speak gently & slowly (only if necessary) when you’re teaching.
Allow them to absorb your movements quietly – you don’t have to vocalize everything because that could add too much information too soon!
How to Make A
Slip Knot
How to
Wind A
Centre Pull Ball
Many yarns are sold in skeins or hanks (not balls) – if you’ve got some like that you MUST wind it into a ball BEFORE you use it!
This quick video will show you how to quickly & easily wind a centre-pull ball – that’s a ball of yarn which has the working end coming out of the middle.
Remember to wind loosely!!! Too tight & your yarn will stretch!
Lesson 5.2
Basic
Fingerknitting
.
The most basic technique for fingerknitting is using one (the non-dominant) hand to act as a holder (almost like a knitting needle!) for the yarn, while the other (dominant) hand manipulates the yarn.
This technique is suitable for children from 4 years & of course as a starter technique for anyone just learning to fingerknit.
A child can learn the movements in a few minutes which is a treat because they can be making their first stitches in your first lesson!
Don’t forget that you can use this method to make long strands of fingerknitting yourself which can be used as drawstrings, doll clotheslines, ropes to hang artwork from with little clothes pins or as the base for garlands of ornaments.
I have one hanging in my kitchen window which we hang seasonal paper cutouts & felt ornaments.
Monkey Verse
.
In this video, I show you a quick little verse that you can teach your child if you feel that he/she needs a little help remembering the steps.
If you find that having to recite a verse while fingerknitting seems to be a bit difficult for your child then stop using it for a while & see if they improve.
Sometimes a verse like this is best used when you come back to a project & your child needs a little refresher. Quite often the movements are already embedded in their muscles but their brain is telling them that they don’t know what to do !
This often happens with children who like to do things as perfectly as possible. Remind them that fingerknitting is important BUT if they make a little mistake it is easy to fix!
Nothing has been cut, no paint spilled, nothing is broken – just a little bit of yarn has wandered in the wrong direction (or monkey…) & you have to help it find its way back!
Lesson 5.3
Intermediate
Fingerknitting
.
Using two hands to fingerknit takes this fibreart to another whole level!
Although it looks easy, there are many complex movements that must be made in a proper sequence for the fingerknitting to actually work & look right.
Allow your child to experiment with HOW they actually fingerknit. There is no ONE right way. In fact, I sometimes find myself fingerknitting using a different technique without even realizing it.
Give your child time to find their own rhythm & method.
The only thing you need to remember is to be consistent – if you’re using your right hand as your manipulating hand & your left as your stablizer then don’t switch part way through a project – it will look different!
Fingerknitting is a lovely, fun & easy fibreart that allows young children to make real, useful & beautiful things – their work will make them proud & let them catch a glimpse of future fibre-fun to come.
Make sure you admire your child’s work & yes, if they make you a necklace or bracelet – you have to wear it out – at least once!
I keep my collection hanging in my studio!!
Projects
Here are some simple projects to get you started fingerknitting.
If you purchased the Part I kit from Cedar Ring Circle, use the bulky wool.
If you bought your own yarn for fingerknitting, make sure that it is well spun, smooth enough to slip easily & big enough to make a satisfying number of stitches fairly quickly!
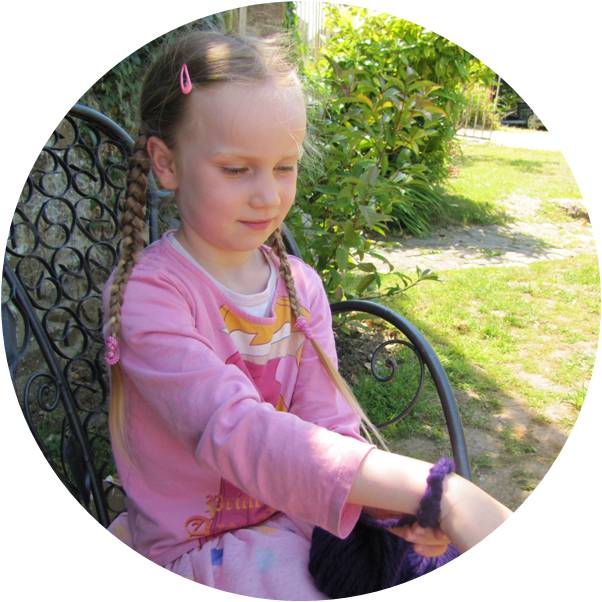
The first project is always a single strand of fingerknitting (using the BASIC one finger technique) this can be turned into a bracelet, necklace, cat toy, rope to lasso play horses or dinosaurs…
The next project will use a strand of fingerknitting that is a little longer (& maybe a bit tighter) – beginners often work a bit loosely…) & formed by either the BASIC orINTERMDIATE techniques -you can coil this piece up & take a few stitches to secure it so that it turns into a doll house rug or a mug coaster.
The most advanced project in this lesson is a small basket ( see included video how-to below).
The projects you can make with these fingerknit cords are endless !
Use them on their own as belts, necklaces & bracelets or add them to other projects as drawstrings & decorations.
As this method produces a cord that is quite similar to corking, you can use these with any corking pattern.
I found a wonderful book online, Spool Knitting by Mary A. McCormack, that was printed in 1909.
It has more than 30 great patterns including doll’s clothes, toys & even clothes for children.
With so many options, your children can spend many happy hours making amazing little ( & not so little) projects !