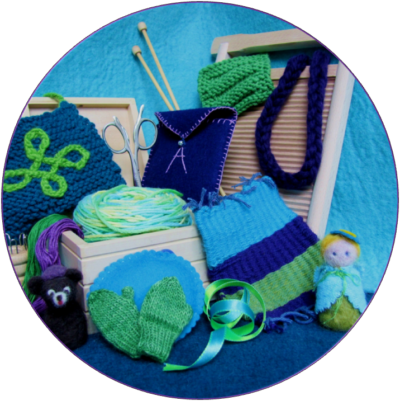
Handwork Resource Library
.
.
Baked Mohair
.

I love fibre – real, natural, straight from the animal fibre (although I’ve been known to fall for some soy or milk yarn on the odd occasion…). So visiting our local mohair farm (really, they’re angora goats) is always a treat. The kids & I pop in from time to time to visit the animals (all 77 have a name) & the kind owner, Lydie, who treats each goat like one of her children. I think yarn feels completely different once you’ve met those who “grew” it!
Knowing that it was kissed & stroked along the way makes it even more special!
Usually we go with a friend or two & I usually leave with at least a few balls of luscious yarn.
A while back, I bought 2 off-white (aka “natural”) balls of Lydie’s heavy weight 75%mohair/25% silk blend. I intended to dye them as a gift for my mother, a master knitter who has knit pretty much everything knittable.

When the time came to dye the mohair, I dragged my heels a bit. I had never seen anyone mention dyeing mohair online & thought maybe there was some reason for that. Then I got hold of myself & thought “Hey, it comes from animals, which often get wet – we use mohair like wool – well I’m going to treat it like wool & see what happens!” I figured I could always go back & buy 2 replacement balls if I bungled it & try again.
My other concern was that I don’t own a microwave! Weird, eh?
I wanted to space dye the yarn which means that you can’t easily dump it into a pot on the stove & stir it up – you sort of have to let the yarn sit in little pools of colour in a container, so only certain colours soak into certain sections. I needed another way to heat the yarn.
Then I realized that I could cook the yarn in the stove, it might take longer but after all, it was the heat I was after not the speed. I did have visions of sneaking over to my friend’s house to use hers but since she was away, I thought I’d better not risk having some sort of un-expected dye episode in her microwave….
So after much reading & a lot of “what-if”ing, I decided to just go for it.
I rallied the kids & in a couple of hours – voila!
Amazing, soft, fluffy, vibrantly coloured mohair!
If you want to try it – here’s what you have to do… (read all the way through first – it will save you a whack of trial & error!)
Gather your Materials & Supplies
- 2- 50g balls of 75% mohair/25% silk yarn (undyed)
- 2 colours of GEL food colouring ( I used Rose & Violet)
- gentle dishwashing liquid
- Eucalan Wool Wash (my favourite!) OR a gentle shampoo & a good hair conditioner
- white vinegar
- 2 -2 L aluminum baking pans with lids
- large cooking pot
- 2 – 1 cup / 240 ml plastic squirt bottles (with lids)
- (optional) rubber gloves – if you don’t use them your hands could be a lovely pastel hue for a day or so!
- old towel
- drying rack
- OVEN
PREPARE your YARN
Our yarn was already wound into balls – so we had to “unwind” it back into skeins.

We used our swifter & carefully made the balls back into 2 skeins of yarn.

BEFORE removing each skein from the swifter, I loosely tied it in about 6 places with some extra yarn (it has to be loose unless you want a tie-dye effect!)

( NOTE: If your yarn is already in skeins, then just make sure they are tied off in a few places to keep everything neat & tidy during your dyeing & rinsing.)
Soak your yarn in a large cooking pot* in cold (not freezing) water & a small squirt of dishwashing liquid for at least an hour – it has to be good & wet. Don’t swirl it around or anything – just gently push it beneath the surface of the water & let it sit.

Once the yarn is very wet, gently lift it out of the pot & arrange one skein in each disposable pan.

I wanted larger sections of colours so I wrapped them back on themselves. You can lay them in any way you like – just make sure that there is only a single layer of skein. Drain as much excess water as you can out of the pan by pressing down gently on the yarn & tipping the water out into the sink.
(NOTE: The more water you leave in = the more the dye will move around. If you want pure areas of certain colours, it’s important that you do this step!)
Place your aluminum pans on a large cookie sheet.
MIXING the DYE
Fill each squirt bottle about ½ full (about 80-100 ml or 1/3 cup) of tap water & 20 ml or 2 tbsp of the white vinegar (you want a 4 pt water : 1 pt vinegar ratio).

Then the exciting part – add about ¼ tsp (or 2 ml) of the food colouring GEL to each bottle & shake gently. You want to make sure that the dye is well mixed.

I used the colours straight from the jar because I knew that the colour would “break” which means that components of the colours would separate & show up on their own. You’ll notice that it looks like I used violet & blue – but I didn’t. The pink separated too, giving me some areas that were primrose while others bordered on a pinky-peach.
( *You can mix colours if you want, just do a little sample first to make sure you’re going to like what you get !)
TIME to DYE!

Before you start squirting around, think about the effect you want to achieve. I wanted to be able to see each colour separately but also have areas where they blended to create new tones.
So I started with the pink (which looks like red) across the top, then I squirted the violet across both bottom sections. I left about 2” (5 cm) between them but the colours wicked towards each other. Luckily, they stopped in time to leave a white area between them.
(My Mother was here when I did this & I must say her eyes widened a bit when she saw the colours after our long discussion of the colours she was hoping for – “looks a bit like the French flag, dear….” was all she said!)
I thought for sure that all of the dye would run all over & right through the skeins since they were wet – but it didn’t!!! So save some dye for later, you’ll be glad you did!
POP your Yarn into the OVEN
Set your oven to 150C° or 300 F°. Seal the pans with the lids & carefully put them (they should already be on the cookie sheet) in the oven. Try not to tilt it; you don’t want dye running all over the place.

After about 40 minutes, gently take the cookie sheet out of the oven & CAREFULLY open the pans.
There will be steam!

The liquid that is left in the pan should be almost clear if all of the dye has been absorbed.
Using a chop stick or other wooden tool, gently lift up a skein & check underneath to make sure the dye got all the way through to the back. If not, carefully flip the skein & add more dye to any parts that are too light.
Reseal the pans & put the whole setup back into the oven for another 30 minutes or so.
Waiting Around
Once the time is up, take another peek. Gently tip a pan & see if the liquid is clear. It should be (or almost). Seal the pan up again & let them cool on the counter until they are room temperature.
This could take up to 2 HOURS. Don’t rush this because if you do, you run the risk of ending up with a lovely felted BLOB of mohair!
Wash & Rinse
Go to your bathroom sink & fill it with some lukewarm water & Eucalan (or shampoo) BEFORE you put your yarn in. One skein at a time.
IMPORTANT – you are not washing your kid’s hair. You don’t need a ton of suds & you certainly don’t want to scrub the yarn. Easy does it. Just let the residual colour run into the water.
If you used shampoo, you’ll want to do a conditioning rinse. It really makes a difference in terms of fluffiness & softness!
At this point, the water in the basin should be pretty clear. You don’t want to leave any excess dye in the yarn.
More Waiting Around
Gently hold the skein up & let as much water as possible drain out of it. Then lay it on an old towel. Repeat the entire washing process with the second skein. Once both skeins are carefully placed on the towel, put the whole arrangement on a drying rack.
After a couple of hours you can remove the towel & drape the skeins ON the drying rack (don’t do this if it might stain the yarn – old wooden racks are unreliable in this case).
(BTW – I didn’t dry the yarn hanging on my kitchen window! I just hung it there to admire it!)

Once your yarn is dry – this could take several days – it should be completely dry – you can carefully (& loosely) wind it back up into balls. We put our skeins back on the swifter & hand wound the balls.

Ohhing & Ahhhing
At this point, you’ll probably be doing a little happy dance (at least I did) because you have now just opened the door to an entire universe of deliciously coloured mohair yarn!

Already, I can see a parade of multi-hued scarves & other delights in my mind’s eye and I’m pretty sure there’s a certain someone who has some ideas of her own, too!

Oh & I guess I’ll have to get knitting something for my Mother in this yarn. After all, she has been waiting for a long time!

Make Stuff ♥ Be Happy !

* Generally speaking, you don’t want to use implements you cook with to dye with. In this instance, I only used the cooking pot to soak the yarn but even so, I scrubbed it thoroughly afterwards – there can be some pretty interesting substances on any kind of yarn, that I didn’t want to end up in my next soup!
In some cases, the yarn, dye & pot can create odd chemical interactions that can be quite toxic (especially if the dye isn’t food-grade like what I used). Just to be safe, spend the few extra bucks to buy the disposable aluminum trays for the baking part!