.
Knitting Fork Tutorial
.

.
Children love to make pretty & useful things,
they like to feel important & accomplished no matter how old they are.
The knitting fork is a wonderful tool to help them
join the world of fibre arts
quickly & easily !
.
WHY should you add the knitting fork to your homeschool handwork basket ?
Well…
Do you have a little one who would LOVE to knit but they are just too young yet?
Do they yearn to do what the big kids are doing ?
Or an older child who just hasn’t gotten the hang of knitting & is a bit frustrated by it all ?
Or maybe you take long trips or have to wait places & wish there was something that could engage your kids AND give them something productive to do.
Keep on reading, then !
.
A very short
HISTORY
of the
Knitting Fork
.
This little tool, which is officially called a LUCET, has a long history & over the years has acquired a few names.
Call it a knitting fork, chainfork or hayfork they are all usually made out of wood & shaped like a lyre with two prongs & a small hole near the base. Big, tough Vikings used large versions to make cord & rope on their ships. Fine ladies used daintier ones over the centuries to create drawstrings for evening bags, cords to hang their watches & scissors from their belts & even jewellery.
Today our “instructor”, Arabella will demonstrate the easiest method to use a knitting fork – there are other more elaborate ways to use one but well stick with the basics for now) . Since she is 5, we thought she’d be the perfect person to show you how to do it !
This process will give you a soft, loose & elastic cord.
.

.
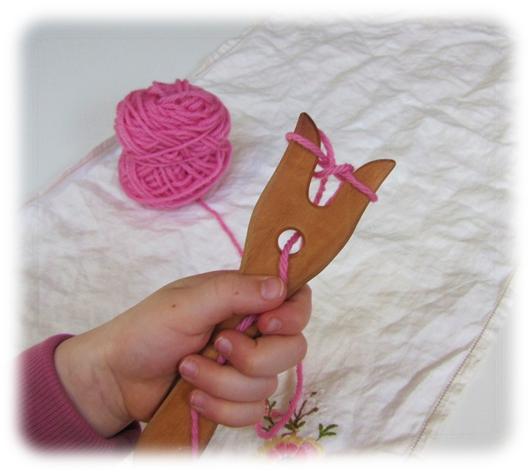
1. Materials & Tools
– a knitting fork – which can be bought from many online vendors for a few dollars (or euros) – get more than one, you’ll want to use one too !
– yarn (you can use any yarn or string or even ribbon, but soft wool is nicest for the little ones)
.

.
2. Technique
Basically you are using the knitting fork to make loops out of yarn. The prongs or tines hold the yarn until you make the loop & the hole guides the cord that you are making. The distance between the prongs & the size of the hole determine the final size of your project.
STEP 1 – Thread the yarn through the hole from back to front (the end hangs out the front)
Hold the end down under your left palm (reverse for lefties).
Always keep the knitting fork in the same position facing you.

.
STEP 2 – Wrap the yarn counter-clockwise around the right prong – come from the back, between the prongs

.
STEP 3 – Wrap the yarn clock-wise between the prongs & around the other prong. You are making a figure “8”.
.

.
STEP 4 & 5 – Repeat the wrapping process again. You should now have 2 figure “8”s on the knitting fork.
.


.
STEP 6 – Lift the BOTTOM loop over the top loop on the right prong & then on the left. Drop it off over the back of the knitting fork.
You have formed your first stitch !

STEP 7 – Gently tug on the end hanging out of the hole to tighten the stitch & push the loops down to make room for the next figure “8”.

STEP 8 – You will now have only 1 figure “8” left on the knitting fork.
.
STEP 9 – Repeat & repeat & repeat.
Continue making figure “8”s – make sure you wrap them the same way each time – lifting the loops over & pulling gently on the cord coming through the hole.

.
STEP 10 – Finishing.
Continue until you have made a cord as long as you like.
Cut the yarn about 6″ (15cm) long. Lift last loops off prongs & gently pass cut end of yarn through both.
Pull to tighten & fasten end.
.

.
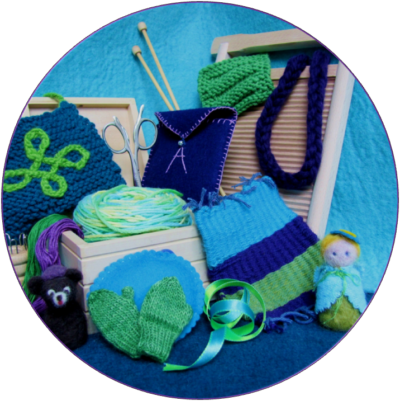
3. Projects
The projects you can make with these cords are endless !
Use them on their own as belts, necklaces & bracelets or add them to other projects as drawstrings & decorations.
As this method produces a cord that is quite similar to corking, you can use these with any corking pattern.
I found a wonderful book online, Spool Knitting by Mary A. McCormack, printed in 1909. It has more than 30 great patterns including doll’s clothes, toys & even, clothes for children.
Your children will spend many happy hours with this simple tool !
.

.
Make Stuff ♥ Be Happy !
.

Enjoy this tutorial ?
.
You’ll LOVE our Handwork Resource Library !


